Getting Started
Open Your First Workspace
- Download and install Neotask.
- Sign in and finish the setup prompts.
- Open Agents.
- Select the main agent and start in Chat.
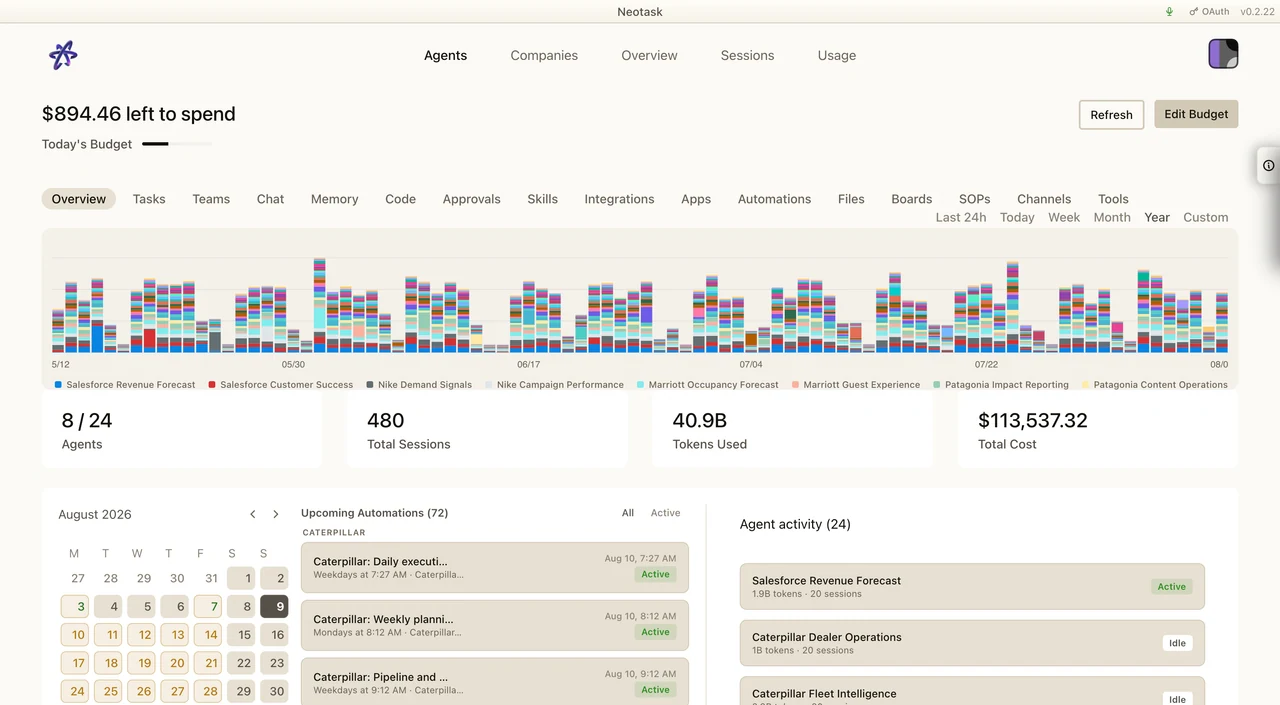
- Open Overview to see scheduled work, sessions, and recent activity.
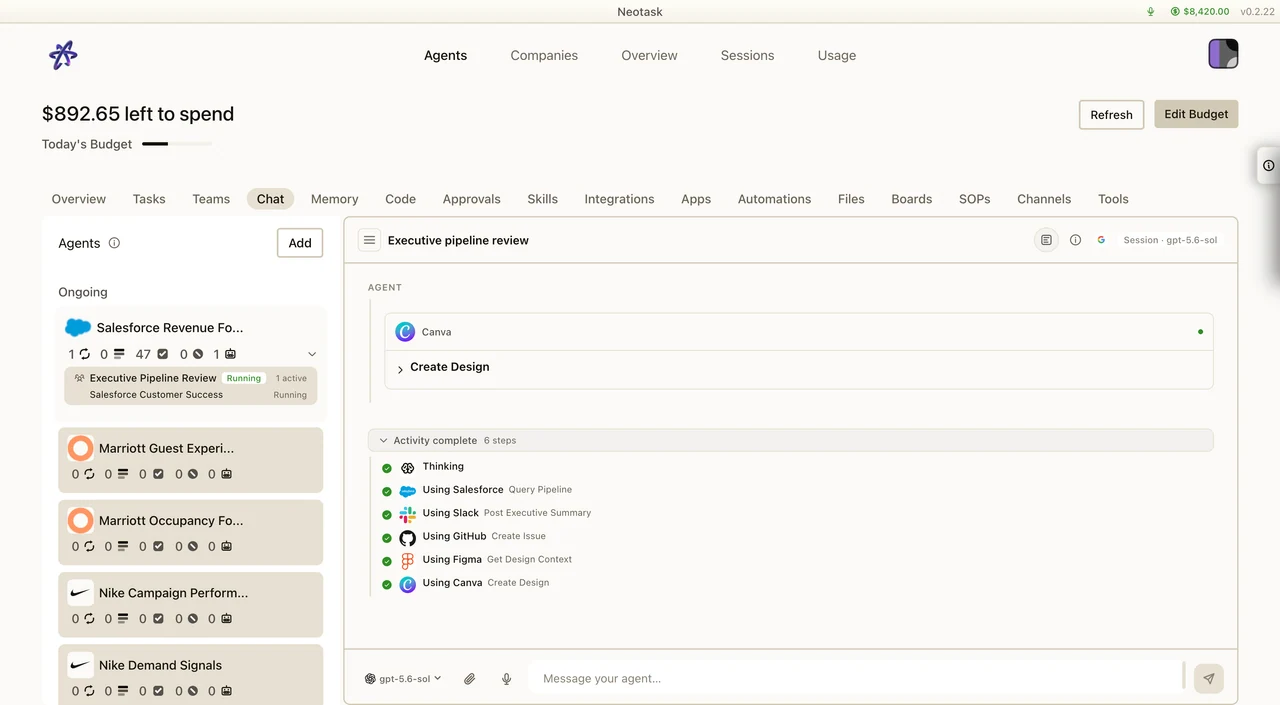
This guide walks you through installing Neotask, activating your license, and deploying your first agent.
What Is Neotask?
Neotask is a unified AI agent platform. It gives you a desktop application, web dashboard, and orchestration engine to deploy, manage, and scale AI agents across messaging channels, voice, automation workflows, and more.
You are not buying a fixed number of agent runs. You are getting full access to the platform. Your subscription covers the software, and your agents consume AI tokens as they work. See Billing & Plans for a complete breakdown of how pricing works.
If you start on the Free plan, your access is narrower: you can use chat, boards, coding workflows, and connected apps within the Free message quota, but company operation, user-created automations, scheduled jobs, and custom agents require at least an Individual subscription. Free usage includes the first 10 messages/events, then 5 messages/events per user-local calendar day, and every allowed hosted-model message still needs credits or BYOK provider balance. Local models on your computer are free and do not count against these limits. See Free Plan.
System Requirements
| Platform | Minimum Version | Format |
|---|---|---|
| macOS | 11 (Big Sur) or later | DMG |
| Windows | 10 or later | EXE installer |
| Linux | 64-bit distribution | AppImage |
All platforms require an active internet connection for license activation and agent communication.
Download & Install
Download the latest version from your Neotask account dashboard or the link provided in your purchase confirmation email.
macOS
- Open the downloaded
.dmgfile. - Drag Neotask into your Applications folder.
- Launch Neotask from Applications or Spotlight.
- If prompted by Gatekeeper, go to System Settings > Privacy & Security and click Open Anyway.
Windows
- Run the downloaded
.exeinstaller. - Follow the installation wizard prompts.
- Choose an install location or accept the default.
- Launch Neotask from the Start Menu or desktop shortcut.
Linux
- Download the
.AppImagefile. - Make it executable:
chmod +x Neotask-*.AppImage - Run the AppImage:
./Neotask-*.AppImage - Optionally, move it to
/usr/local/binor integrate it with your desktop environment.
License Activation
On first launch, you will be prompted to enter your license key.
License key format:
NT-XXXXXXXX-XXXXXXXX-XXXXXXXX-XXXXXXXXYou can find your license key in your purchase confirmation email or your account dashboard at neotask.ai.
Enter the key, click Activate, and the app will verify your license online. Once activated, the app is tied to your machine. You can manage active devices from the Web Dashboard.
Onboarding Wizard
After activation, the onboarding wizard guides you through initial setup in 11 steps:
| Step | What You'll Do |
|---|---|
| 1. Select Agent Template | Choose a pre-built agent template to start from |
| 2. Configure Agent | Set your agent's name, personality, and behavior |
| 3. Set Budget | Define daily spending limits for token consumption |
| 4. Connect Channels | Link messaging platforms (Slack, Discord, Telegram, etc.) |
| 5. Connect Google Workspace | Authorize Gmail, Calendar, Drive, and Docs access |
| 6. Developer Features | Enable or disable terminal access, code execution, and Git integration |
| 7. Built-in Skills | Select from pre-packaged skills like web search, file management, and summarization |
| 8. Automations | Set up scheduled tasks, triggers, and automated workflows |
| 9. Voice Control | Configure wake word, language, and microphone input |
| 10. Notifications | Choose notification preferences for desktop, email, and mobile alerts |
| 11. Download & Launch | Finalize configuration and launch your first agent |
You can skip any step and return to it later from Settings.
Free users may complete company onboarding, but the company cannot run tasks or automations in Free mode. The company dashboard remains gated until the account upgrades to at least Individual.
Agent Templates
Templates give you a pre-configured starting point. You can customize any template after creation.
| Template | Use Case |
|---|---|
| Assistant | General-purpose personal assistant for everyday tasks |
| Developer | Code generation, debugging, Git workflows, and terminal commands |
| Researcher | Web research, source synthesis, and report generation |
| Social Media | Content creation, scheduling, and engagement across platforms |
| Data Analyst | Data processing, visualization, and insight extraction |
| Home Automation | Smart home device control and routine management |
| Voice Assistant | Voice-first interaction optimized for hands-free use |
| Tutor | Interactive learning, explanations, and quiz generation |
| Campaign Manager | Marketing campaign planning, execution, and performance tracking |
Quick Start
Once onboarding is complete, try these to get familiar with Neotask:
Send Your First Message
- Open the main chat panel.
- Type a message in the input field, for example: "Summarize my unread emails."
- Press Enter or click Send.
- Your agent will process the request and respond in the chat.
Try Voice Control
- Click the microphone icon in the toolbar, or say your configured wake word.
- Speak a command, for example: "What's on my calendar today?"
- The agent will transcribe your speech, process the request, and respond with audio or text.
Explore the Dashboard
- Click Dashboard in the left sidebar.
- Review agent activity, token usage, and connected integrations.
- Use the dashboard to monitor performance and adjust agent settings.
Next Steps
- Desktop App: Learn the interface in depth.
- Agents: Customize agent behavior and configuration.
- Skills: Add capabilities to your agents.
- Voice Control: Advanced voice commands and language settings.
- Integrations: Connect additional messaging platforms and tools.
- Billing & Plans: Understand the platform pricing model and usage fees.